When “She Who Must Be Obeyed” cracks her scepter, even trees tremble. Such was the case when I was awakened from a deep sleep after a brutal day in the mines and the Princess declared she was in need of a “ruler rack.” (OK, maybe it didn’t happen that way but it could have.) Apparently, the precision measuring devices most quilters use require storage and since the Princess has a lot of these magic rulers, a small stand with canted slots was in order.
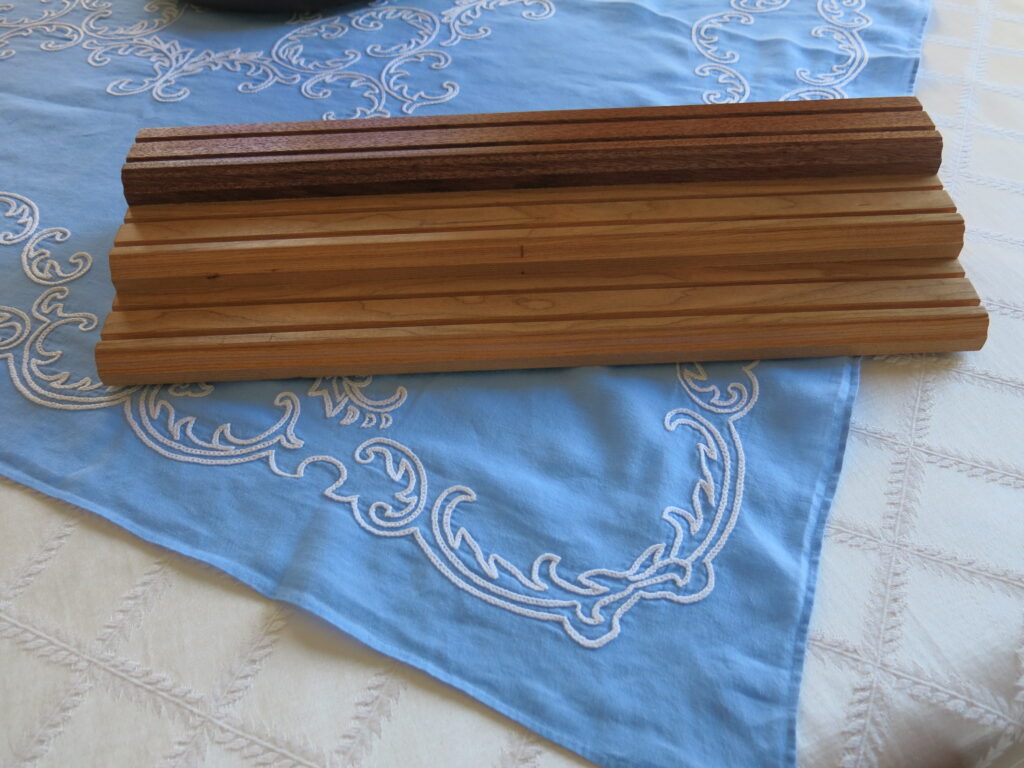
As a prototype, this one is made of spare pieces from other projects but is essentially 3/4″ stock cut to 6″ for the base, 4″ for the middle section, and 2″ for the top. Since this was scrap wood, several glue ups to get the required widths were completed and then everything cut to size at a little over 18″ long.
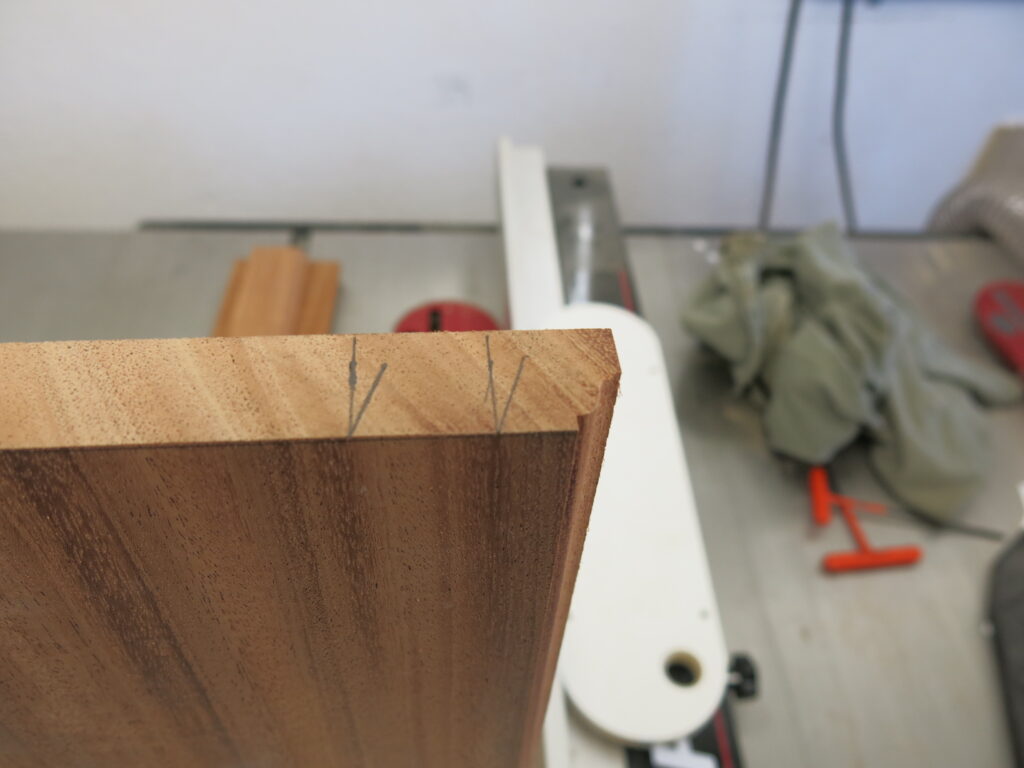
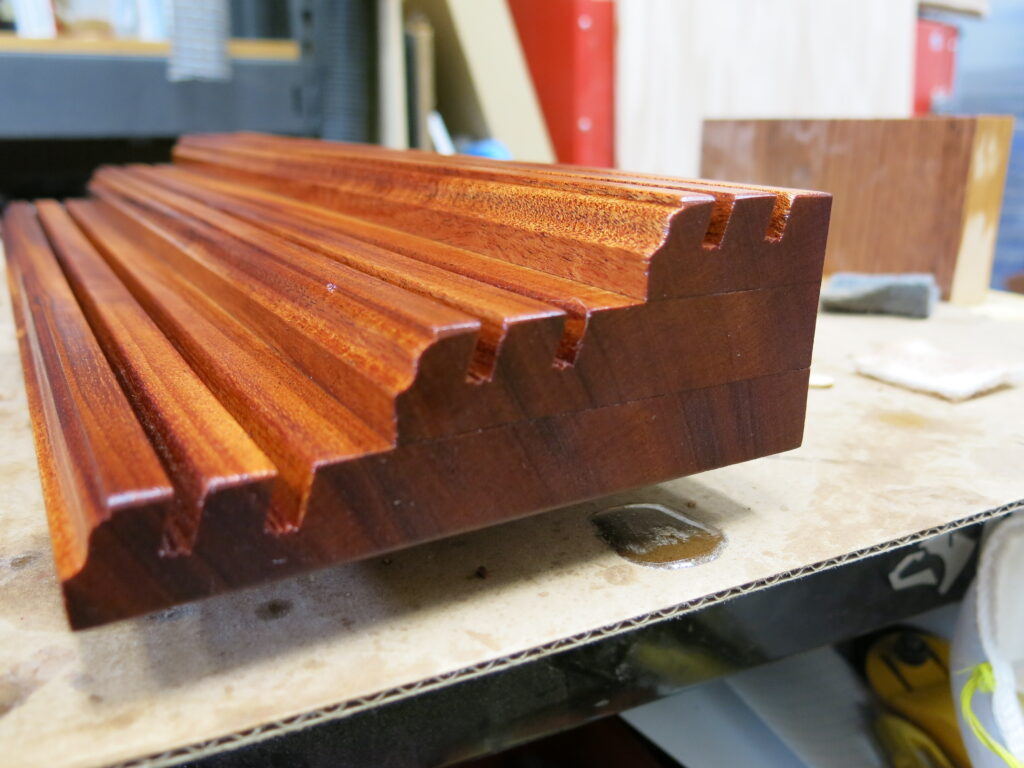
The top is mahogany, the bottom slabs are cherry (yes, I too weep for the trees). After rough sizing, a decorative edge was put on the front edge which adds some detail but also allows the rulers to lay back without rubbing on the wood. There’s enough reveal in this design to highlight the top grain in the wood so figured wood adds to the project’s character. You can certainly use more common varieties of wood but since this is a table top piece, I went a bit over.
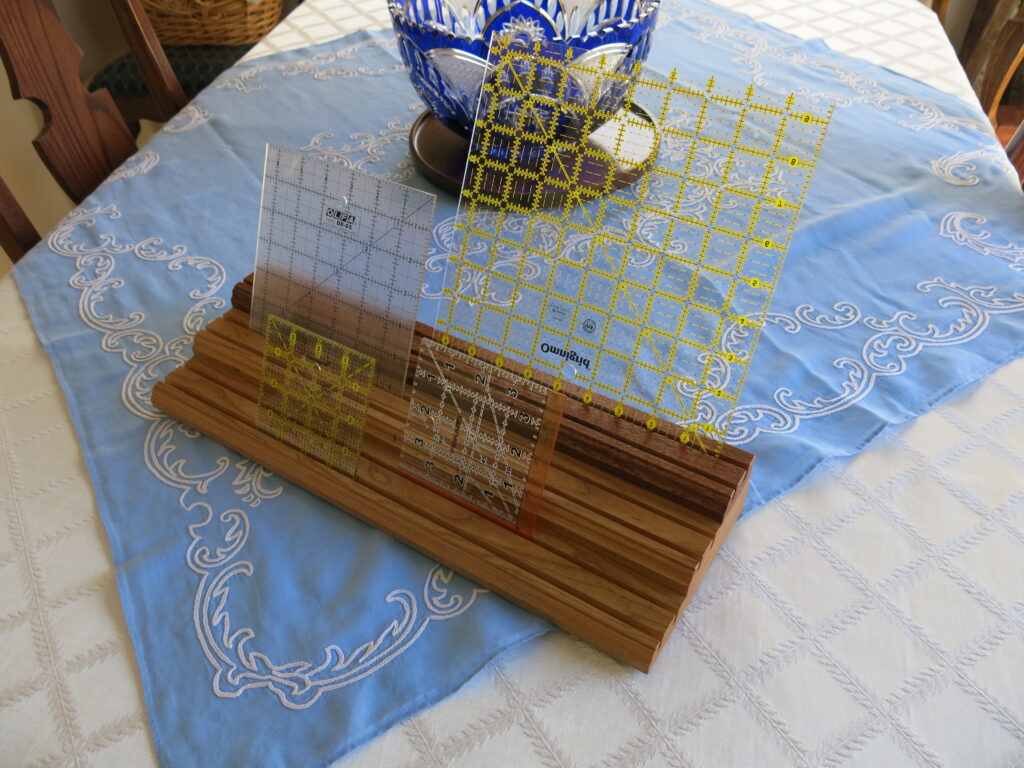
Then the slots needed to be cut. I measured out the slots from the back edge to ensure they were are all the same when assembled and the slots closest to the next level were far enough away to keep the rulers from touching the wood. Turned out this was 3/4″ and 1-1/2″ on the top deck. Then add 2″ for the next and 4″ for the last. The slots to hold the rulers are two passes on the table saw set at 30 degrees. The slots are 3/8″ deep and a bit over 1/8″ to allow the rulers to fit without rubbing. It’s important that you size the slots correctly; the rulers are made of plastic and friction will rub the text off and could damage the rulers. I also used an 80T blade that leaves a “V” cut in the kerf. This means that the finished slot has two small ridges that keep the edge of the rulers from rubbing on the bottom of a flat slot; less friction and wear on the true edge of the rulers that quilters run their razor knives on.
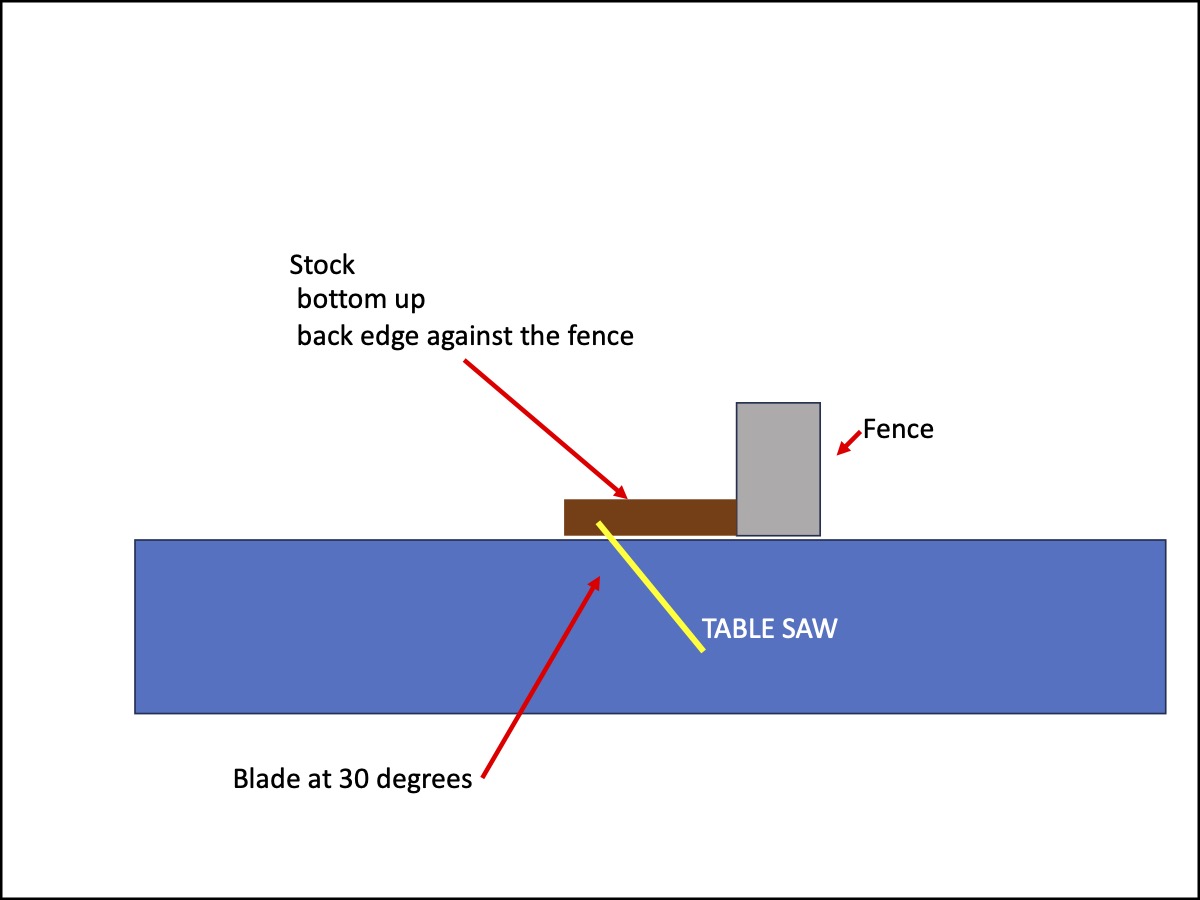
In theory, you could glue this up and then cut all the slots at one time using spacer blocks but for me, that is too much room for error. Also, my saw tilts to the left and my fence does not have a right side fence face. So, I cut each piece individually and doubled checked the spacing as I went. Slow but sure. If you’re going to make a bunch of these, a small sled would make all of this much easier.
Once all the cutting was done, the three slabs were glued up with the back as flush as possible. A multitude of clamps were required to get adhesion across the entire span. I used wood glue on this one but clear epoxy would have been a better choice.
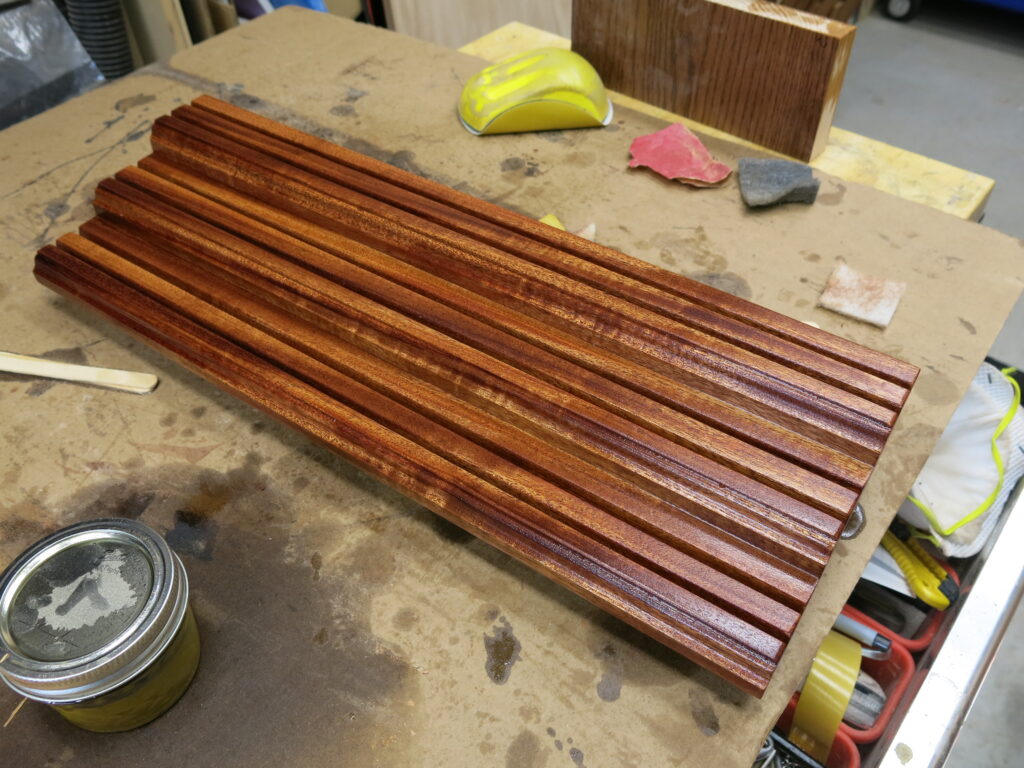
Once dried, I re-cut the sides and back to be completely flush. Sanded out to 320 and finished with three coats of Minwax tung oil finish. (Not my best choice.) Make sure you sand out the slots and add some finish in them! I buffed between coats with a white 3M pad to keeps the nubs down and to ensure the slots were smooth. When everything was dry, a coat or two of clear paste wax gives it a smooth semi-gloss finish that’s soft to touch. Some felt feet pads keep the wood from scratching the tables she uses. The three pieces glued together are heavy enough to keep the rack stable, even with the big rulers placed in the back.

I’ll eventually make another of these with different wood. You can see the side shows the different grain of the glue-ups which i am not a fan of. I’m thinking all mahogany or walnut would be a nice touch. But, like butcher blocks, you can go crazy on these too. For now, the Princess is happy and that’s what counts.

Part Deux: The Quest for Chatoyance
So…as expected, I made another rack. Befitting the Princess, I bought a piece of highly figured mahogany for the endeavor. It also gave me a chance to refine some of the techniques described above. That’s my excuse; I am not an addict.
Anyway, measuring the location for the slots is better done before you shape the edge but, it’s not hard to cut the top rail, then just lay out the next rail end to end so the slots can be marked out. I found this easier than trying to use the protractor on each piece. Secondly, it allows you to mark out the width of each slot (and their direction!) which makes doing the passes faster and more accurate.
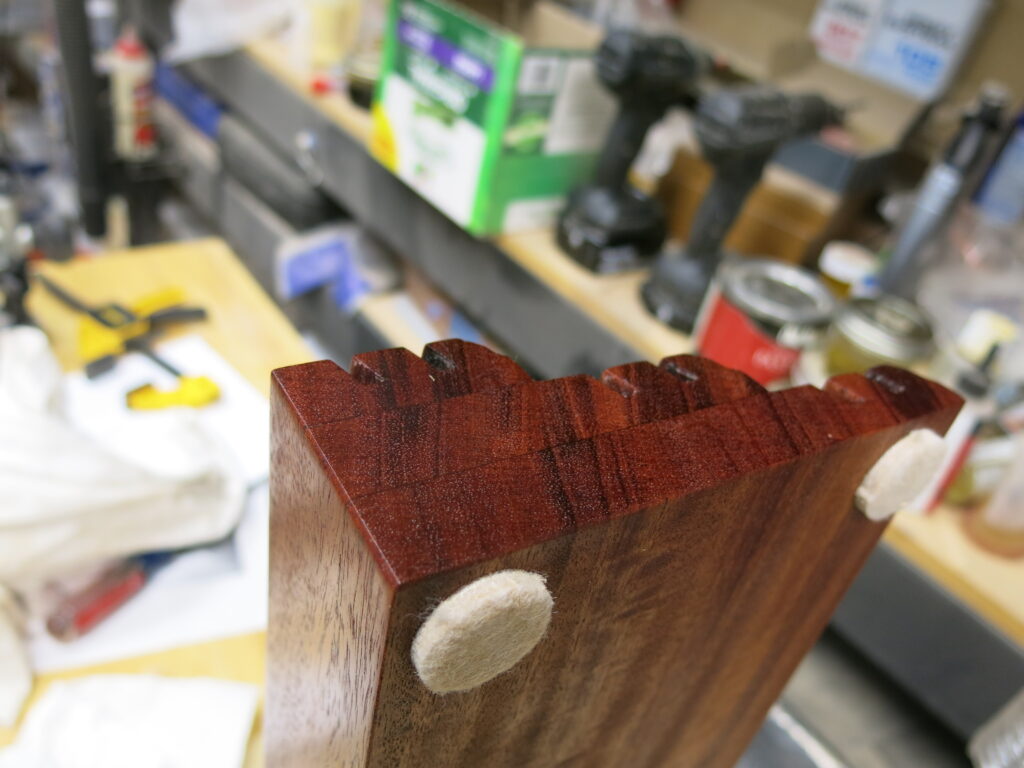
In a change from the first one, I used marine epoxy to glue this up. Other than waiting a day for it to dry, there’s no down-side in doing this. The seams virtually disappear and barring a nuclear explosion, it will probably stick together. If you are a fan of end-grain, epoxy will be very clean with minimal glue lines. End-grain porn to the right. Note: if you use walnut, epoxy will probably make the glue line black and very visible.
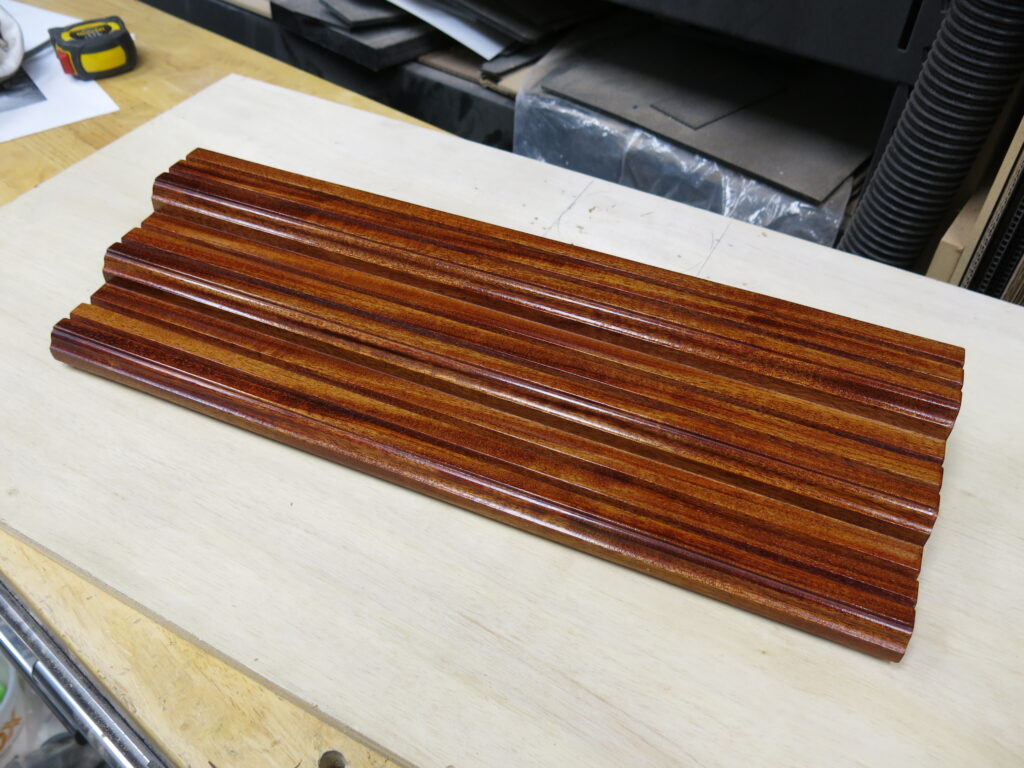
Using such a nice piece of wood allowed me to match the direction of the grain and the figuring. If you’re thinking “so what?” look at this! That crazy tiger’s eye look and depth is called “chatoyance” by uppity woodworkers and people who live in France. To the rest of us, that’s just some beautiful figure. For such a nice piece of firewood, I used a 75/25 split of pure tung oil and mineral spirits to get the oil deep in the wood and set the chatoyance. If you just apply a fast drying top coat to wood like this, the full depth is not likely to come out. Just for reference, this picture has only two coats of oil split on it. Jealous yet?
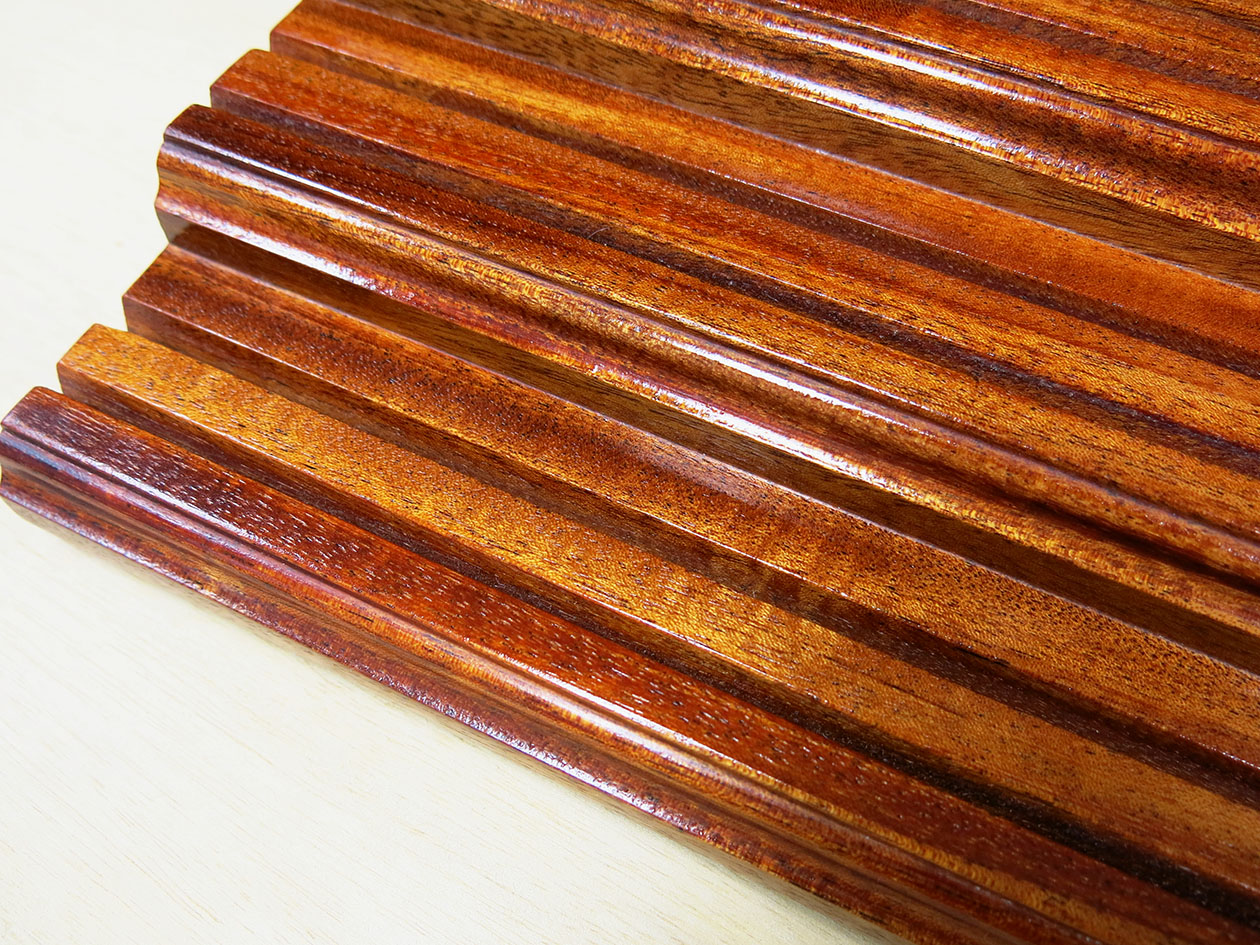
Finally beat the wood into submission and here you have it. After letting the tung oil cure for four days, it really brought out the orange hues in the wood. Not a big fan of orange but the wood has nice depth and the tigers eye portion really sparkles. Top coat is four coats of tung oil varnish rubbed out to 800 grit. Final polish is just clear paste wax to make it easy to take care of and soft to the touch. I was going to try gloss lacquer over a sealer but the chemicals in both the sealer and retarder (to give the lacquer time to flow out) may not be good for plastic. My Lexan test piece got real cloudy so I passed. Anyway, not too shabby for a gloss finish. The Princess was presented with the now thoroughly dead tree parts and pronounced them good enough. Apparently that means I will live yet another day.