So…this month we celebrate our 18th wedding anniversary and of course, that needs a project. What better way to mark the milestone than with some slave labor (of love) in the shop? Thusly, the Princess commanded a quilt rack of specific dimensions and character to serve as a door-side table. And…it was so.
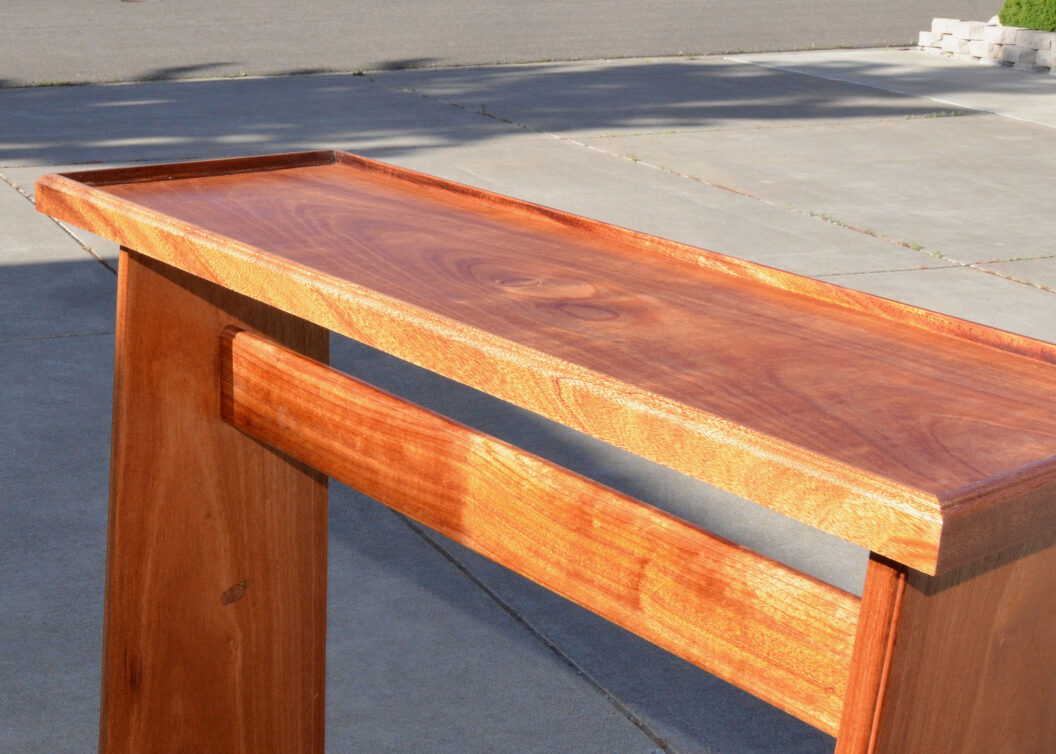
I was fortunate to find some mahogany with extraordinary grain and depth. After forking over a king’s ransom for this potential firewood, the loot was carted home and I cut some rough dimensions for the legs. I don’t have a taper jig so there was some confusion at the saw table until I got the spacers figured out. I needed the grain to run straight up and down, not at an angle, but some MDF spacers got it done. The original plan called for through-cut hearts in the sides but upon examination, it would have been a crime against nature to carve a blank hole in this wood. My OCD kicked in and the project was on hold until…
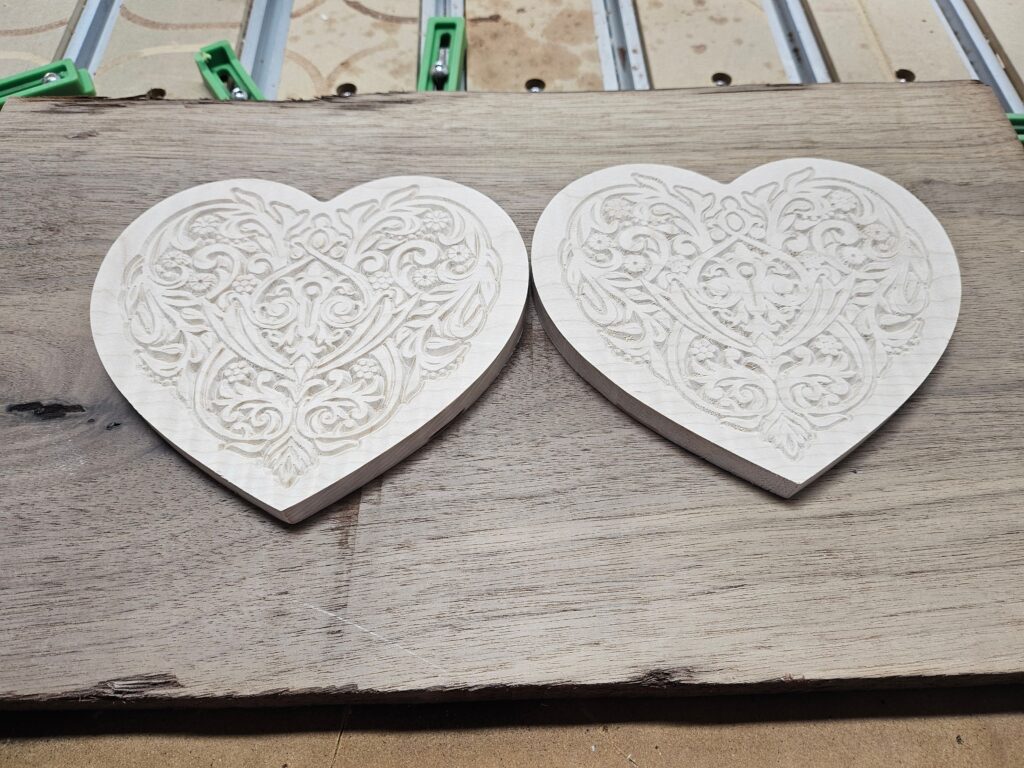
Etsy to the rescue! I located an exceptional craftsman who makes products with CAD/CAM in high quality wood and he agreed to cut some flame maple to my required dimensions. Many thanks to Dave Baker from Baker Family Woodcraft for enabling my OCD and producing these fantastic inlays. The matched pair are 1/2″ thick and cut so the “flame” pattern is vertical. “Alas,” you say, “the grain will be perpendicular to the grain in your project, knucklehead.” Fear not, as I used oil to pop the flame before finishing. The visual effect is that you see the flame, not the grain, something I learned the hard way on the chessboard. But then, you knew that. Cutting the pocket for these would have benefited from a template but I didn’t think that far ahead. I wound up free cutting these with a small plunge router and then cleaning up the lines with a chisel. I was sweating bullets doing this as there was so much on the line with each pass. Next time…template, for sure.
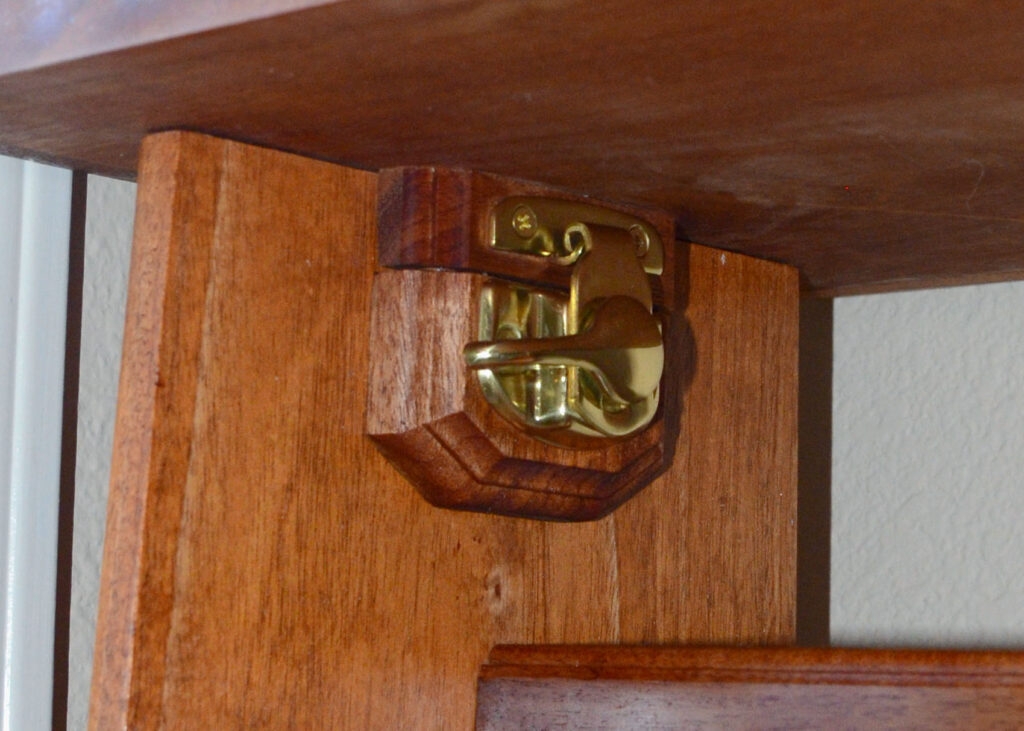
Since the stand will be used to display quilts, which the Princess will no doubt frequently change, I wanted the top to be removable but also easily replaced and secure. I settled on indexing dowels and some solid brass sash locks to make it work. Sadly, even the scrap used to make the base for these had great figure which I then covered up.
I used epoxy for all the glue ups and for most of the joints. This piece will be subject to constant changes in temperature and I wanted to ensure the bonds held. Other than the long wait between glue ups, it was a better choice than wood glue. The glue lines are black and blend well with the mahogany. The heart inlays, however, are set with epoxy and filled with wood glue to avoid that black line around the edges.

Because the wood was really spectacular, I wanted a “running grain” on the edge for the top that faces the room. The figuring goes from sparkling tiger’s eye to deep lines and runs uninterrupted around the table to the back corner. This picture doesn’t do it justice so, for the full effect, watch the video!
The top and frame were finished separately due to the work that would go into rubbing out the finish. The frame was sanded out to 220 and all the end-grain was done out to 320. Then the fun began with five coats of tung oil varnish. The initial flood to seal the end-grain and the darker parts went on for seemingly hours but eventually it leveled out so I could wipe it off. Between coats I used a white 3M pad to knock the nibs off without leaving pieces of steel wool in the cracks. No one wants steel wool in their cracks.
The top got 12 coats before letting it cure for three weeks. The first coat was 75/25 split with mineral spirits to get deep penetration. Then…the work began. The next four coats were sanded down with 400 each time until they were level which made the final work a bit easier. (Cutting through the finish layer each time requires care. It’s easy to make the surface un-level and/or let the sawdust fill the now open grain. If the grain is wide, this will make the grain lines indistinct at the end. I chose to fill the grain with oil which takes a few days in between coats to dry.) Using a block, I went through the grits to 3k and then automotive polishing cream and finally auto wax. (I don’t leave these on the wood, they’re just used to cut and polish the finish.) The top is smooth like glass and reflects light at all angles (watch the video!). We can debate if this was overkill or not but “Her Highness” is pleased which means I’m pleased.
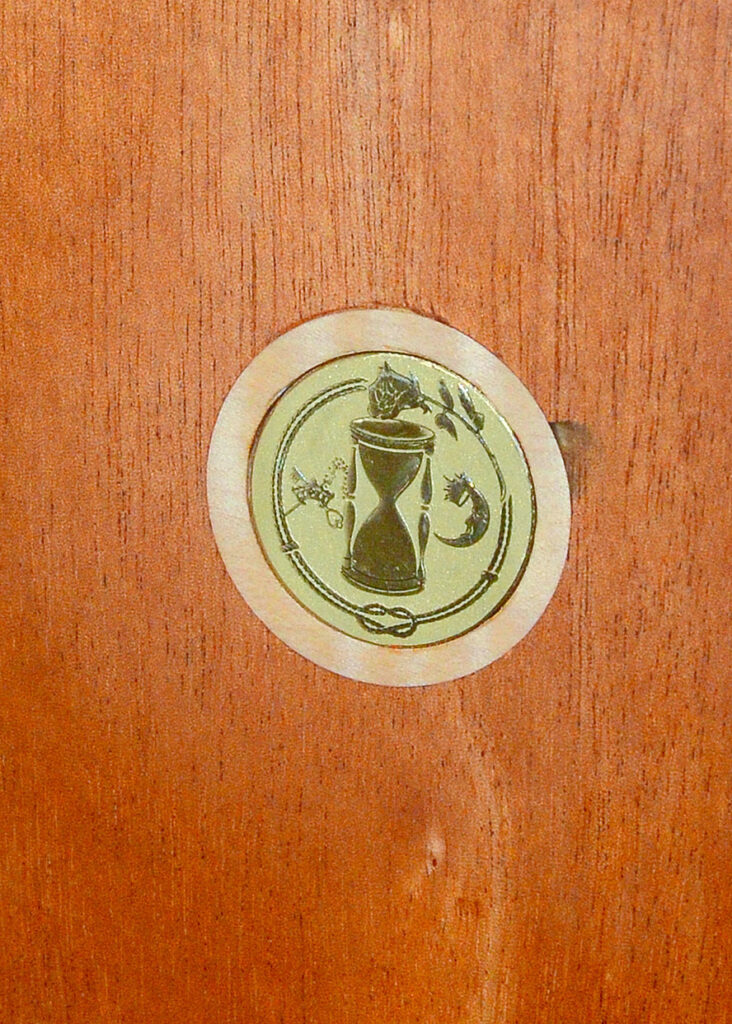
Of course, this piece got the maker’s mark coin reserved for only the most precious of dead forest products. It too was inlaid with maple but the effect is not as apparent as the hearts. The coin was set on the inside of one leg, as our little secret, so the nick you see is concealed. Don’t tell anyone.
As I mentioned at the beginning of this saga, I was fortunate to get some really high quality tree for this project. It really is the star of the show. With the oil finish, the figure really pops and makes this piece worthy of my long suffering wife. Being married to me is, most assuredly, a penance for her but with 18 years down and life to go (thanks Bon Jovi!), I hope she’ll grit her teeth and tough it out.