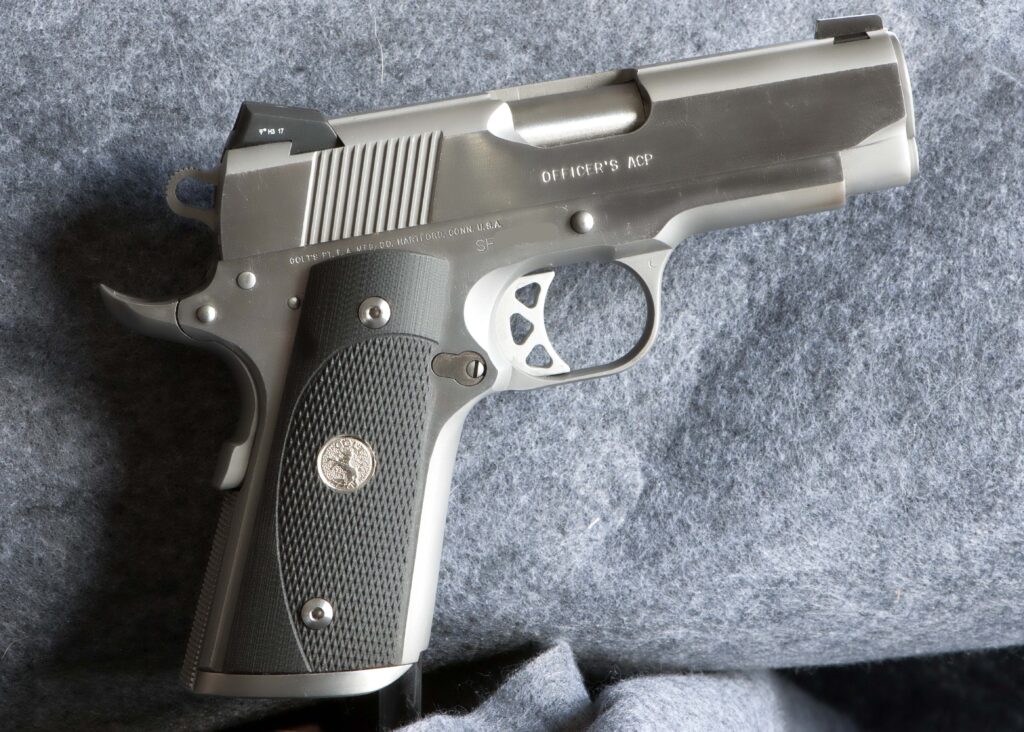
Before the plague hit, I would take in a few beater guns each fall to work on during the winter. In that vein, I took this pistol in since it obviously seen better days. The trigger was a mess, rear sights beyond repair, and the lock up was sloppy. The previous owner claimed it “…shot pretty good for a short barrel gun”. This wasn’t my first gun show but apparently it was a “truck gun” and for $400, I couldn’t walk away. I would learn some hard lessons on this one though.
After a total breakdown, I elected to do a reverse bushing from EGW, Novak sights, DLASK trigger, fire control from Cylinder and Slide, Brownells grips screws, all new springs from Wollf, and grips from VZ (cuz they don’t get better than this). I wound up ordering all “everything” from EGW and Brownells after I got started.
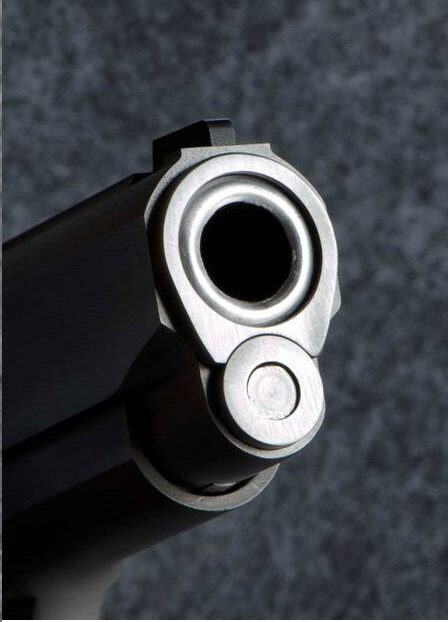
After cleaning up the slide and smoothing out the dings, I re-fit the slide to the frame and it was time to do the reverse bushing. This is a project for which you need sharp files and patience. If you cut too deep, you’ll mess up the lockup and the only fix is to have the frame welded. So, if you do this, go slow and test often. Once the reverse bushing was cut, time to fit the barrel. I used a thick match bushing to match the cut on the spring plug and give the barrel end a flush appearance. The advantage to using EGW’s match bushings is that there is enough excess material inside and outside to get a tight fit. Once I had the lockup correct (new link don’tcha know) and edges clean, the top round was bead-blasted. I didn’t do the sides yet in case there was a problem later on. It’s important to me to protect the roll marks and too much sanding or polishing early on can mess em up. When that was complete, the slide was sent to Novak for low profile tritium night sights.
Meanwhile, the frame was cleaned up, and I decided on an EGW magwell as well as a matching beaver-tail grip safety. (Are you noticing anything here?) Fitting the grip safety is always a tense project for me. I use a radius jig to rough out the horns but the rest has to be done with small hand tools and emory paper if you don’t have a mill (which I don’t). Once you make that first pass with a rough file, there’s no going back. The magwell is more forgiving but some extra time spent here can make the difference in a well finished pistol. This one was blended to the mag funnel and the heel was beveled.
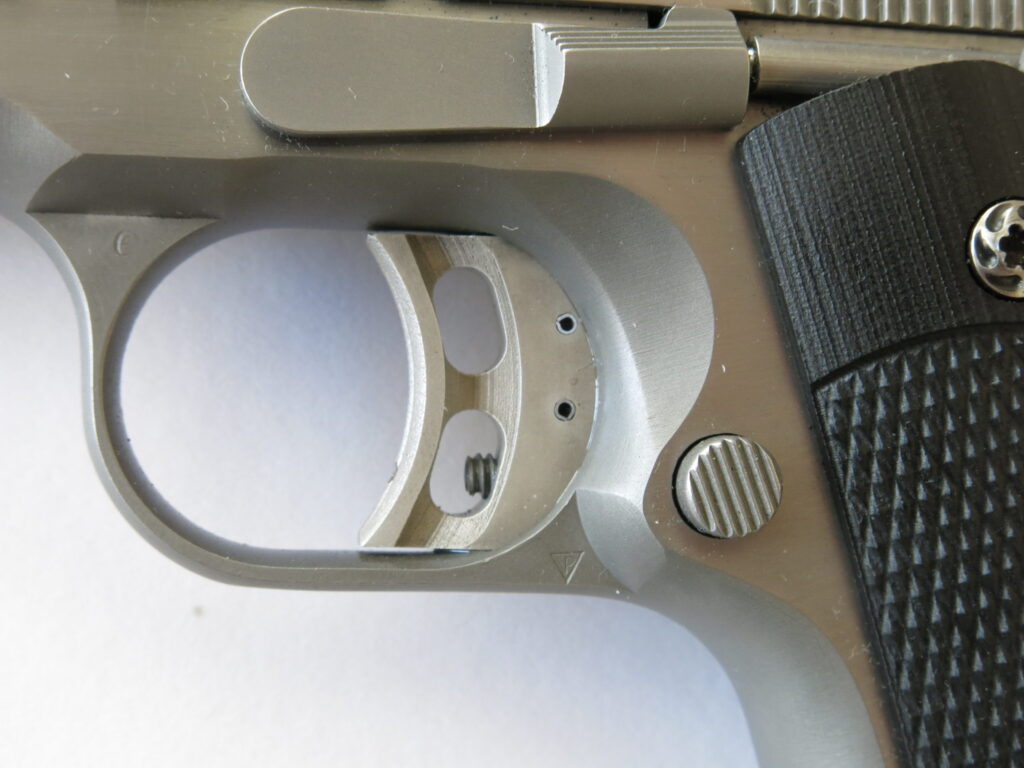
DLASK magnesium triggers are supplied oversize in all dimensions except the inside of the bow. Before doing the trigger, I used a hone and polished the trigger way in the frame. You don’t need a lot here but smoothness counts. I used a bow block to ensure the pad was straight and then…over an hour of sanding on a piece of glass to get the fit perfect. Using adhesive sandpaper on the glass ensures that the abrasive surface is completely flat. I start with the forward edge and cut backwards until the trigger will just fall in with just a bit of friction. Then all the contact surfaces are polished down to 1200 grit and jewelers polish until there is just a bit of light showing around the edges. You can do this faster but my triggers are smooooth with no wobble and no scratches on the sides from the frame. The trigger bow is polished and taped off before bead blasting the pad. Since I intended to sell this gun, I took the over-travel screw out. I didn’t need it for this trigger and the chance it may come loose and prevent the trigger from pulling all the way back is a risk I don’t want. (I provide them and the wrench to the buyers in case they want them but most don’t.)
I cut the hammer hooks down to .021 and use a hone to get everything square. I learned how to do this from an expert smith after trashing dozens (OK, a lot!) of hammers and sears. You need the right tools and a good magnifying headset to do it right. It was an expensive bunch of schooling but it beats drop-in every day of the week. Every contact piece in the guts is polished to 800 grit and then buffed with jewelers rouge. Probably overkill but it’s smooth. Did I mention that it’s smooth?
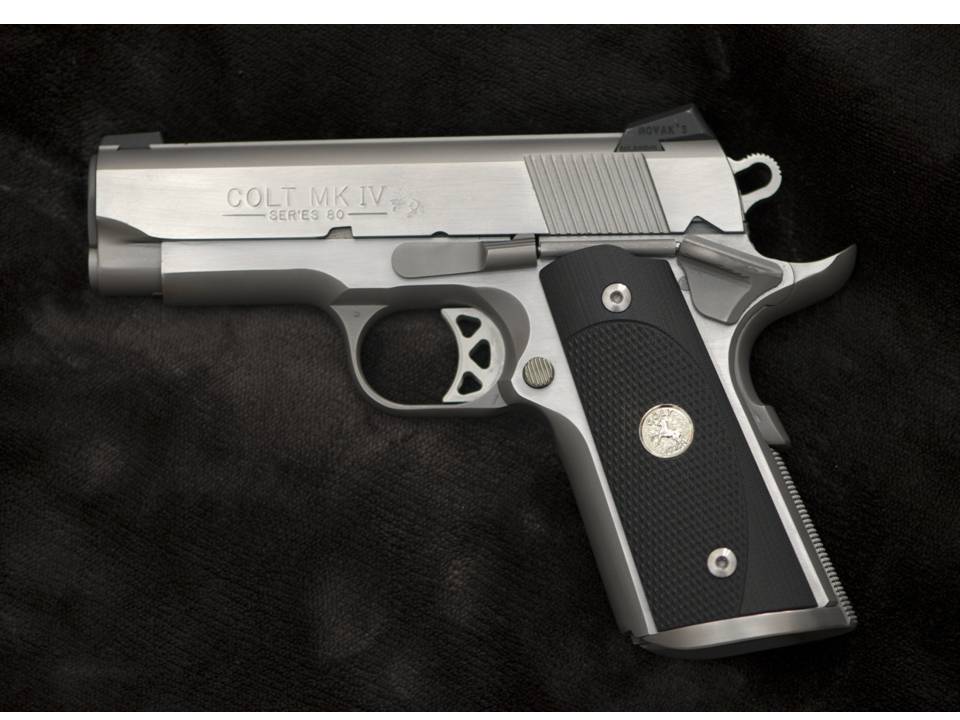
By this time the slide came back. Novak always does a great job with quick turn around times and no exception with this job. After fitting the new extractor and firing pin, everything was ready to check and recheck lockup. I wound up using a taller link and new pin to get it right. The rails of the frame are lightly peened at the front and rear and most, if not all, of the tool marks are removed with Emory cloth. I re-checked lock-up for the 800th time and then lapped the slide to the frame…I use Brownells 600 grit paste which takes longer than valve grinding paste but reduces the chance I’ll cut too much. Once the 600 is smooth, I use 800 paste for the finish. The result is a slide that moves back and forth without changing angles and doesn’t bind. Add a drop of oil to each side and it’s like glass on glass.
The pistol is then assembled and the thumb safety is cut to fit. I relieved the contact surface with the stop spring to allow the safety to “snick” into position and then add a detent in the contact surface. This ensures the safety will fully engage and still freely click off when released. Again, an oversize part from EGW and the result of a humiliating lesson from an expert smith.
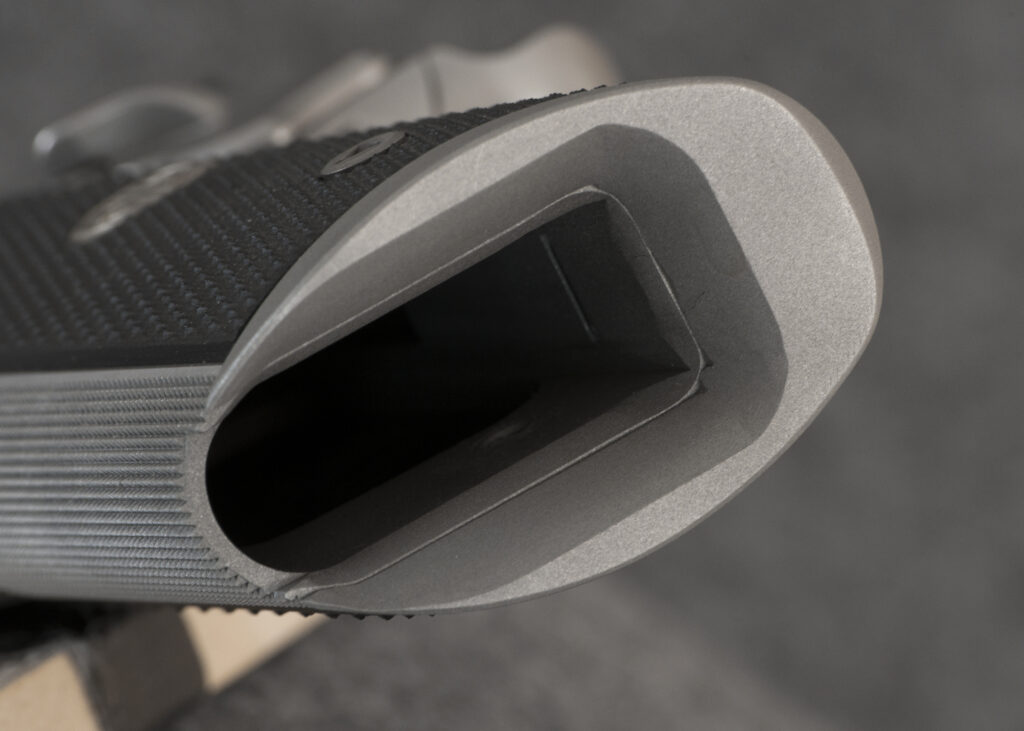
The action is stressed to ensure the springs set and the lock up is consistent. I used a lot carbon paper and magic marker at this stage. All the bevels at the back of the frame are checked to ensure they’re clean and consistent. Same with the bottom edge of the slide. Then the flats are taped off with painters tape and cut back with a fresh razor blade. After blasting, the flats on the slide, grip safety, and frame are sanded on glass to get them flat and the brush marks all going the same way. (Don’t sand off the roll marks!) Take care to keep the frame flat or you may narrow the horns and screw up the mate between the grip safety and the frame. I opted for a full length guide rod on this pistol which I cut to be flush with the bushing. (There’s a small hole in the rod for a pin used for take-down.) The end is slightly chamfered. Finally all the small parts are bead-blasted again to match.
Everything is run through a sonic cleaner to get the glass beads off. Sometimes two or three times to get the slide cleaned out. The parts are dried, cleaned with break cleaner and then the first lube. I use either Lucas or EGW grease for the first coat on raw metal. Probably superstitious but it makes me feel better. During final assembly the proper oil or grease is applied so the slide rolls like glass and springs are lubed.
I waste time polishing the main spring at the contact points before setting the trigger weight. Wolff springs are consistently on spec and finished well, so polishing is probably a waste of time but… I do it anyway. Since this is a carry gun and I was going to sell it, trigger weight was set at 4.5 lbs. You can go lighter but there is a lot of risk involved if you make an error. Having seen 1911 builds go full auto at the range, this is not an area where you want to mess around.
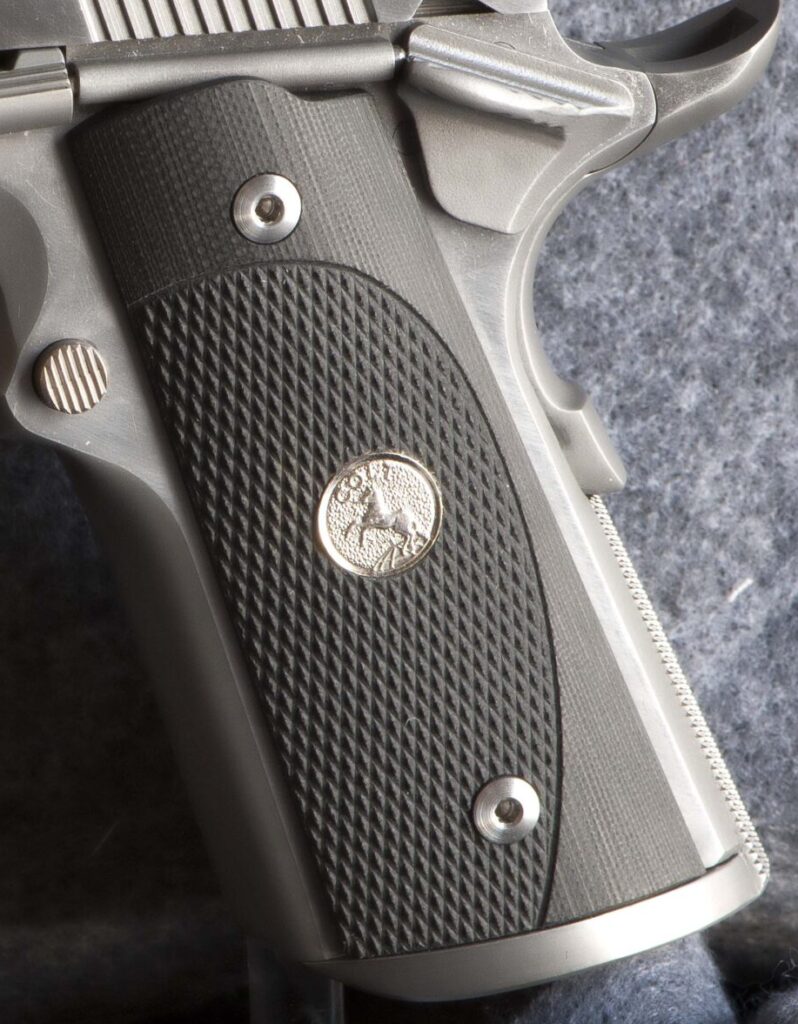
Now the grips…I like VZ G10 grips because they are always cut well and consistent across the patterns. I made a jig for installing medallions but for this project, nothing would do besides solid sterling silver Colt ponies. Yup, jewelry in a pistol grip. Precise measuring is key here and I use a combination of Woodpeckers steel rules and center finders as well as a precision divider set. Measure five times and then measure again. Don’t forget to square up the drill press! I use a 1/16″ pilot hole to center the Forstner bit that cuts the medallion hole. This leaves a hole on the inside of the grip for the epoxy to run out. The hole is cut just a bit deeper than the medallion to allow for the epoxy.
I use JB Weld (long set up recipe) and clean the medallions and the hole pockets with carbon tetrachloride. You could probably use brake cleaner and do just as well. But, use a lint free swab to wipe out the pockets. If you use a Q-Tip, you’ll spend some extra time trying to get the fuzz out of the hole. While the glue was setting up, I chased the grip bushing threads with a tap and installed Challis grip bushings with red lock-tight. Challis undeniably makes the best bushings anywhere and I put them on every 1911 I work on. Never had a bad set and they make oversize sets for stripped frames.
After everything is fitted and functioning well, it was off to the range. I was pleased to get solid groups at 25 yards and most importantly, no mechanical problems. A little sight adjustment to get on center and that was it. I run two different boxes of 50 (including two mags of hollow points) through any gun I transfer but shooting a “Christmas tree” at seven yards makes the time and reloads fly by.
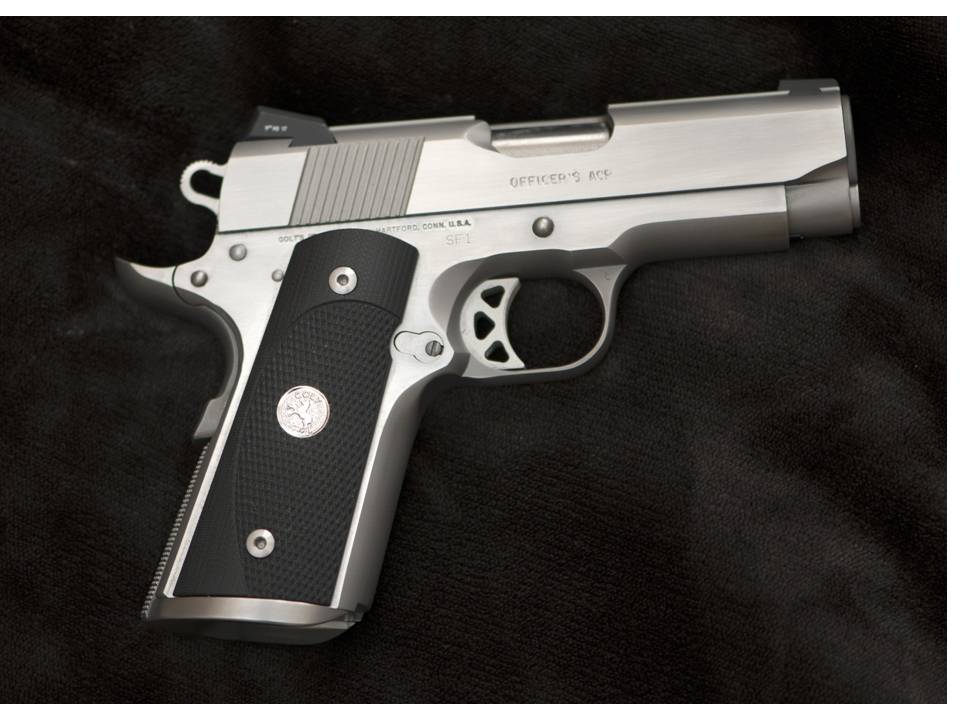
I bought a standard Colt box off eBay and added two Wilson mags to the kit. I eventually sold this gun after almost four months of advertising during the plague. I got back what I put into it but barely. However, this was a project that taught me a lot and I think it came out well. It helps to have OCD and the right tools.
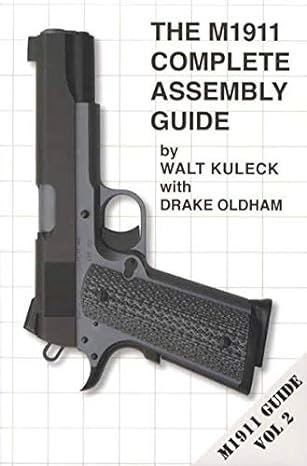
Admittedly, I learned a lot of this stuff the hard ($$$) way but twice had the benefit of a true expert 1911 smith to school me. If you’re going to try any of this, read “The Complete M1911 Assembly Guide” by Walt Kuleck. There a many ways to rebuild a 1911 but if you follow this book, you’ll probably get it right.