
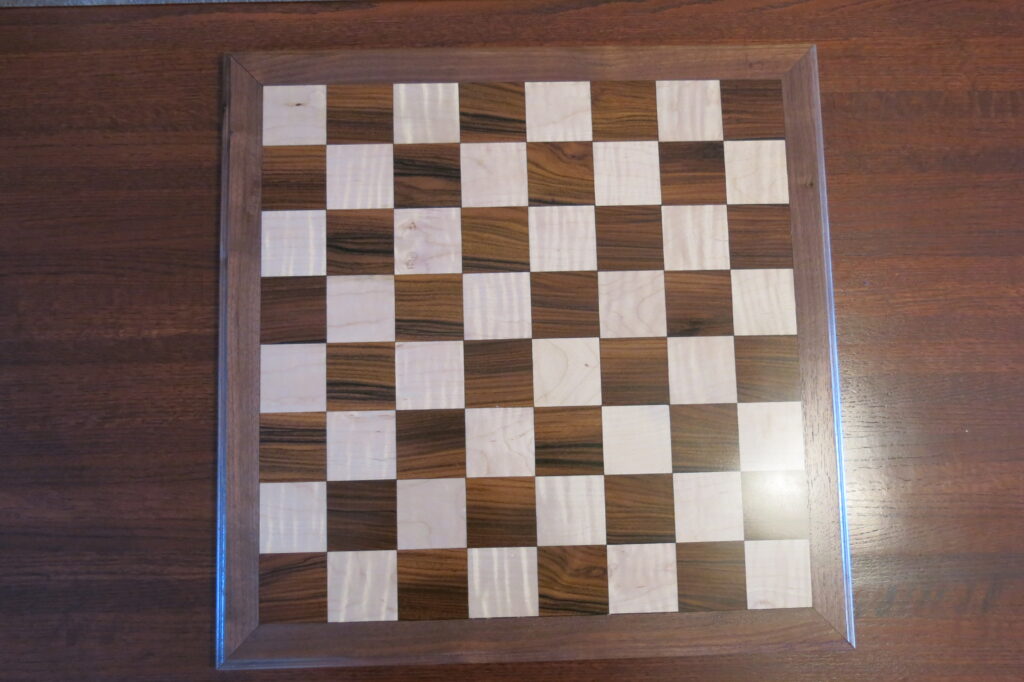
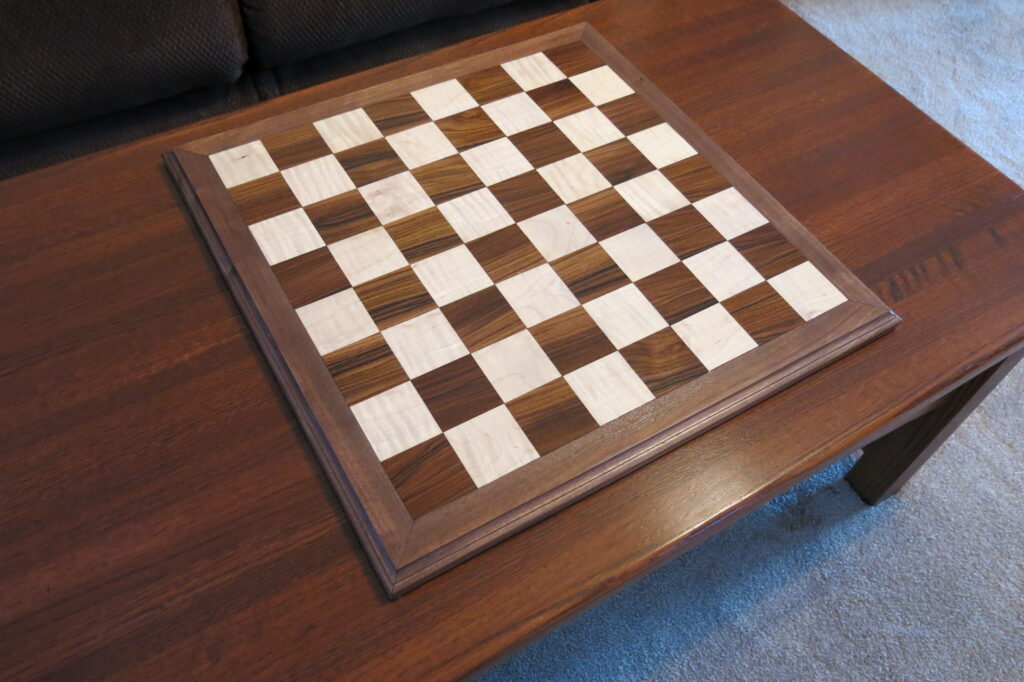
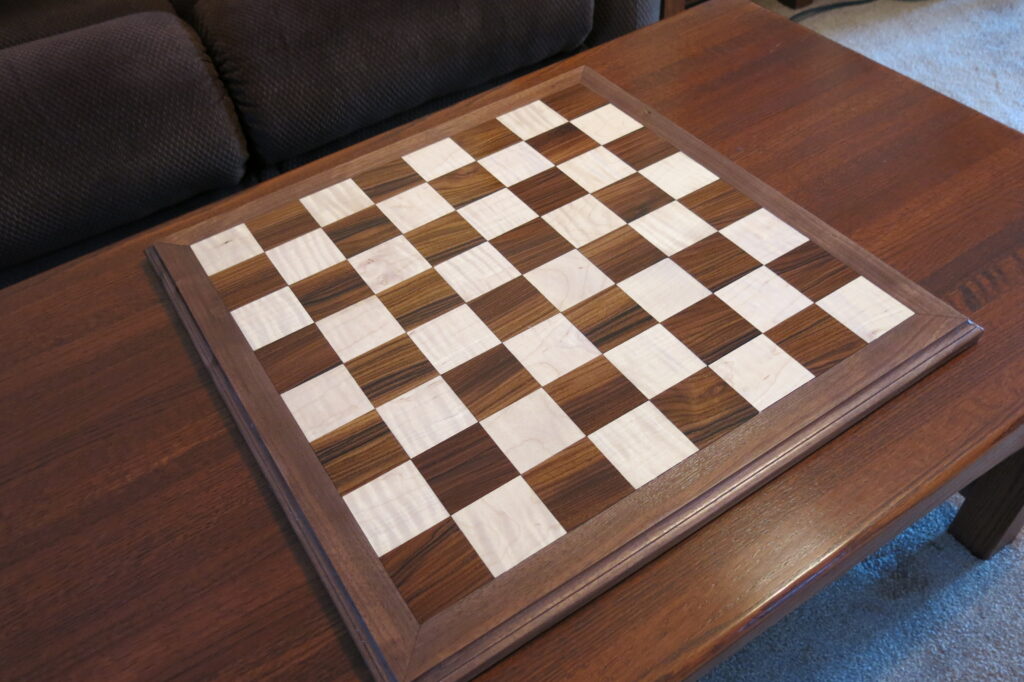
I like chess and especially well made pieces and boards. It was obvious at a young age that I was more a “Boring Spastic” than “Boris Spassky” but my appreciation for the boards and pieces never waned. My girl plays chess and I bought her some Staunton pieces a long time ago be we could never find a board that paired well with the quality of the pieces and didn’t cost a fortune. So…time to make some sawdust.
I tried several processes to make squares but nothing really worked until I used a sled jig to cut 1/4 stock. You have to get this right 256 times. After trying several different methods, I settled on glued stock over MDF saturated with marine epoxy. I’m addicted to exotics and heavy figuring, so I ordered some Bolivian rosewood and some flame maple and went to town. A few critical skills first: This needs a jig to get all the squares exactly the same. Test fit and number the squares so the grain and the chatoyance runs the way you want before you start glue up. You can see I missed this step, though people that have seen the board have said the grain is more important than the chatoyance. Most of this lines up well but I think I would rather have the rosewood grain and the chatoyance of the maple parallel. Pictures taken at different angles show the difference which bounces with the angle of the light.
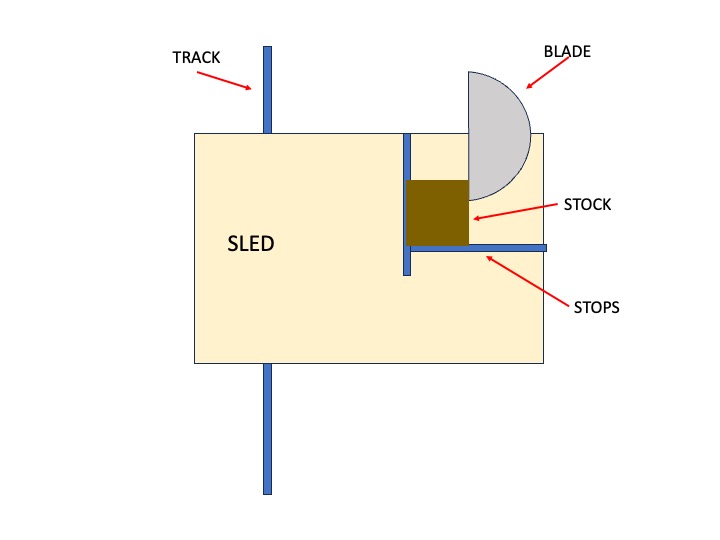
Anyway, I made a sled jig from miter track and some 1/2″ MDF. I use this because MDF is flat and slick. Once I got my size measured out, I just screwed and glued stop blocks to the mini sled and started cutting. I used a new 90 tooth blade to get a finished edge which is critical unless you have a planer. Using my sled, I had to really make sure the stop block was kept clean otherwise a bit of saw dust will throw the squareness off. Once they were all done (and marked) I laid the cut pieces out on edge using a sheet of glass to ensure they were all square to each other which gives you another opportunity to size the odd ones. DO NOT sand anything at this point. I scored the glue side with a box knife but this was probably not necessary. Finally, they were ready for…
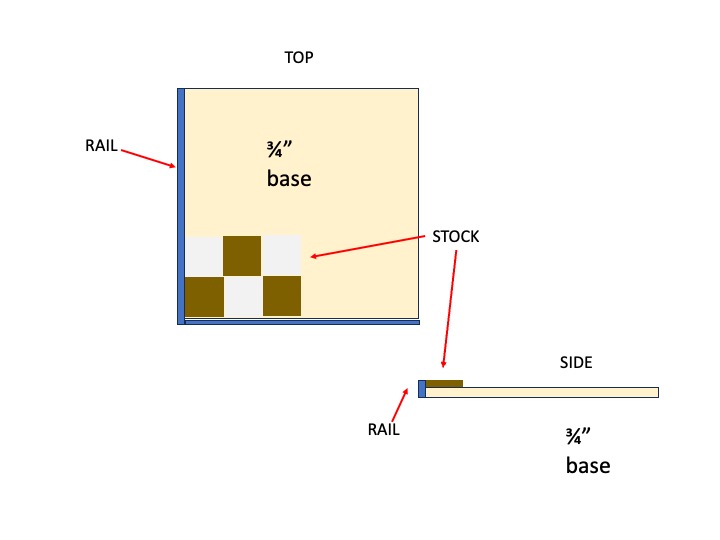
A piece of 3/4″ MDF a little larger than your finished playing surface was squared up and I scored the surface with a box knife in all directions to give the glue some bite. Sand the score lines with 120 to get the edges of the scores off and bring the panel back to flat. Wipe off the surface with either mineral spirits or acetone. Don’t flood the surface or it will swell. Once it’s dry, tack some 1/4″ MDF strips on two adjoining edges to act as a stop for lay out. These should be a bit lower than the thickness of your squares.
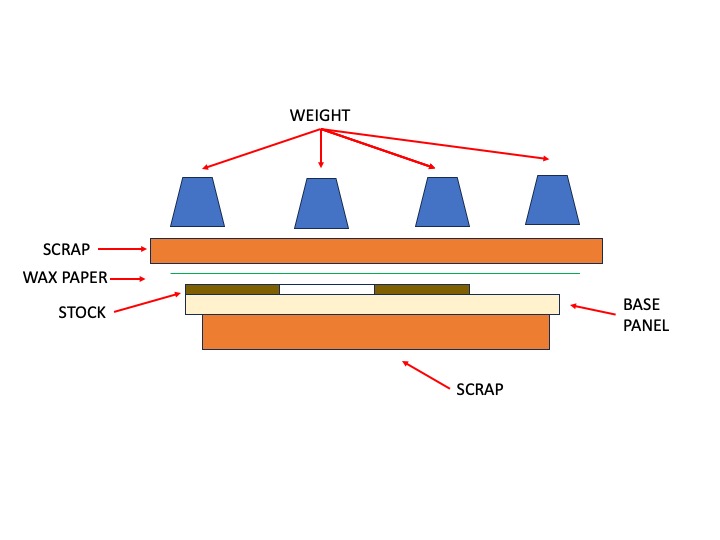
Lay out some poly sheet on your work surface to catch your overflow. Put your panel on a piece of scrap to get it off the table and big enough to ensure your piece doesn’t wobble. Make sure the scrap doesn’t get glued to your piece. Cut another piece of scrap large enough to cover the whole piece and cut some wax paper to match. You’re going to glue all your pieces to the MDF panel and then sandwich that with wax paper, the large piece of scrap, and some weights. (don’t use clamps; they will make stock shift before you get it all locked down.) Have all this prepped and ready to go, then…
Mix up enough epoxy to cover (flood) the entire panel and the edges of the squares. I use West slow set marine epoxy. Makes sure you mix more than you think you’ll need because if you stop in the middle to mix more, the MDF will swell and you’re screwed.
Spread out a big puddle of epoxy on the panel with a putty knife or some scrap and keep moving it around until the MDF has an even surface of epoxy and is well saturated. A plastic notched putty knife works great for this. Wearing gloves, brush some epoxy on the edges of your squares as you set them onto the panel starting in the corner where your strips are. Don’t rush but don’t dawdle either; you want the epoxy to have a uniform thickness and time to get all the squares down evenly. When all the squares are down, STRAIGHT, and snug to each other, tack two cleats down to hold the stock square. Then add the wax paper on top, the piece of scrap that’s bigger than the base, and then some weight to hold it all down. Now leave it alone. Really.
I waited two days before taking the stack apart. Using the guide edges, start trimming the raw edges square in the table saw square a little at a time. You want to sneak up on the actual edg edge of your stock. When the raw edge is done, cut off the guides; again, a little at a time until the grid panel is square. WEAR A MASK!; the epoxy residue is toxic.
Now you can add the side rail stock so they’re flush with the bottom of the panel and parallel to the square stock edges. I made 1-1/2 inch strips of black walnut and mitered the corners before gluing to the square panel with (wait for it) epoxy! NOW get to sanding. I used a power sander with 220 to get the glue down and the stock about 90 percent flush across the top. Then block sanded everything until it was flat to 400 grit. Now you can route the edges in the outer trim pieces and complete the fill and sanding. Since I used epoxy for the base adhesive, i used 5 minute epoxy for some pin holes and a few gaps. It probably doesn’t matter a great deal which kind you use but use adhesives that will bond to each other.
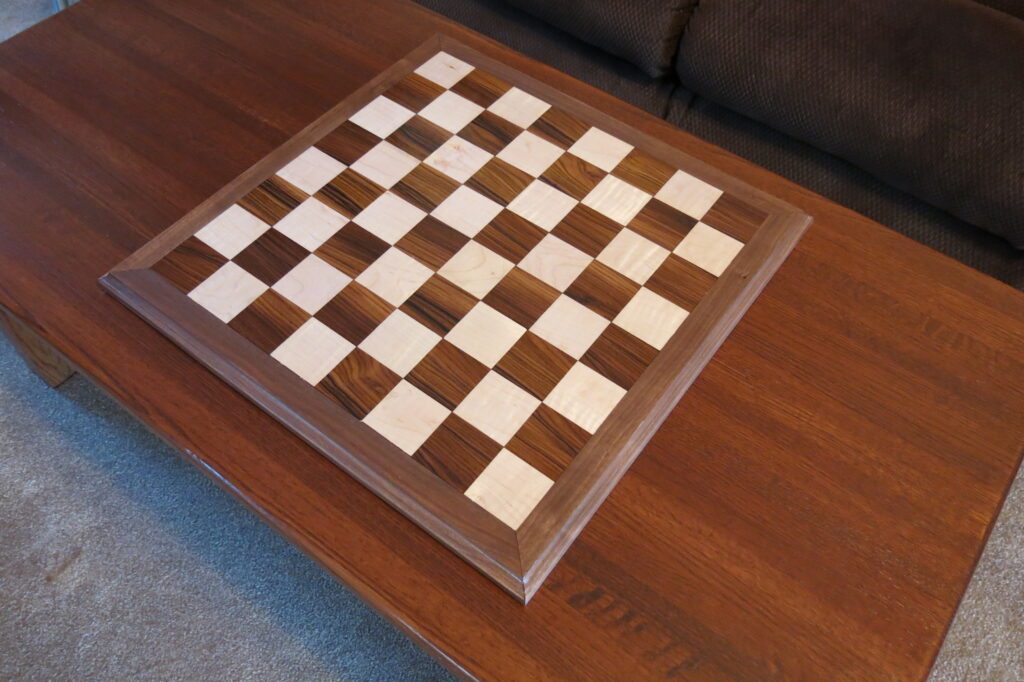
I used Mohawk semi-gloss lacquer and a gravity gun to lay the finish on and took off the first three coats and nibs with 400 until the grain was filled. Part of this is to get the finish in the wood but also to keep the maple as white as I could by sealing it. Then four coats sanding out to 600 and lastly two top coats. I let the last coat cure for a week before cutting it back with 800 grit and then bringing it up 2000 grit, leaving it semi gloss but flat. All the sanding is done with a block to keep it level. I used a retarder in every coat to ensure penetration and leveling. If you look closely at the pictures you can see the chatoyance shift with the different light angles because of this process.
I think an epoxy finish finished out to 3k grit would be a great gloss topcoat but also a lot of extra work. Maybe next time. The board was in the front room for a year or so and showed no signs of expansion or shift. Now I think my wife is using it as a coaster or something somewhere since I haven’t seen it in a while.